The built-in Shopify way
Shopify can import stock from a CSV file on the Inventory page:
- Go to Products → Inventory and Export the inventory CSV for your location.
- Copy the supplier's quantities into it, matching rows by SKU (a lookup formula such as
XLOOKUPin Excel helps). - Import the file back on the Inventory page.
That works for a one-off update. Shopify doesn't download a supplier file from a link by itself, so with a daily feed you repeat these steps every day — or use an app.
Step by step with ShopCSV
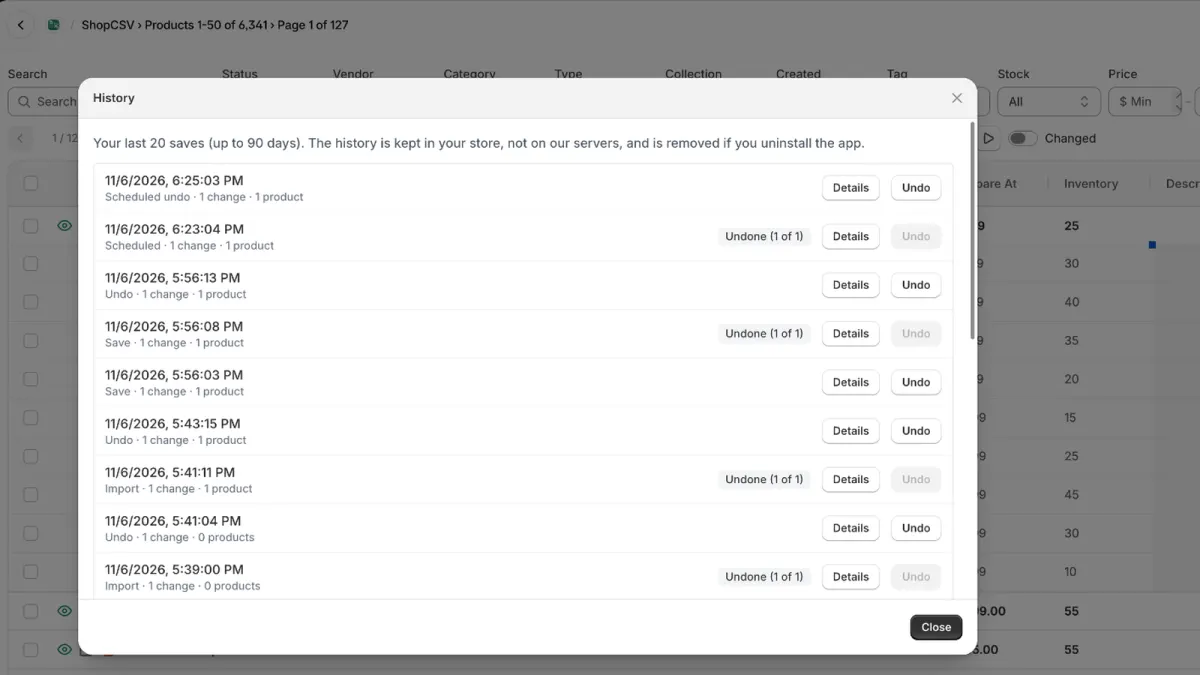
ShopCSV is a bulk product editor that opens inside your Shopify admin and shows products and variants in one editable grid. Every change is listed in Review Changes before it is saved, and a save can be undone later from History.
-
1Get the feed link from your supplier
You need a CSV file at a public https:// link (up to 20 MB) with a column that identifies the item — SKU or barcode — and a quantity column. Price and cost columns are optional. If the supplier gives you an access key, it goes in the link's query (
…?key=…). -
2Create a feed sync
In ShopCSV open Schedule → Automations… and click New feed sync. Paste the link into Feed URL (CSV), pick the Separator and click Check feed: ShopCSV reads the column names and counts the rows. Nothing from the feed is kept.
-
3Match the columns
Choose Match variants by SKU or Barcode, then pick the SKU column (or barcode column) and the Quantity column. Optionally pick a Price column and a Cost column; leave them on Don't update to change stock only. Matching ignores upper and lower case.
-
4Choose the location and how often
Under Location for stock pick the location whose stock the feed sets (the default is your primary location). Quantities set the available stock there. Then choose when it runs: every hour, day, week or month at a time in your store's time zone, or only when you click Run now. Save.
-
5Run it once and check the result
Click Run now on the feed. Runs shows the last 20 runs: SKUs matched, changes made, SKUs not found and changes not applied. Each run is one entry in History named "Feed: …" and can be undone there.
Good to know
- Only what's in the feed changes. Variants whose SKU or barcode isn't in the feed are left alone.
- Runs happen on our server, also when ShopCSV is closed, through the same guarded save as the grid: a value changed in Shopify in the meantime is not overwritten, and products over your plan's limit are skipped.
- Big feeds are processed in steps of 200 rows a minute. If Shopify doesn't answer, a run is retried up to 3 times.
- Your data: the feed settings, including the link, are stored in your store, not on our servers, and nothing from the feed is kept after a run.
- Limits: up to 5 feeds and 20 rules per store. The feed must be an https link — FTP, SFTP and files that need a login aren't supported.
- No link, just a file? Export your products, paste the supplier's quantities into the inventory column and import the file — see how to import products from Excel. With several locations, Export All has one
Inventory: locationcolumn per location.
See it in two minutes
The ShopCSV overview video shows editing in the grid, bulk actions with a preview, scheduled sales, History and undo, and CSV and Excel files.