The built-in Shopify way
Shopify imports products from a CSV file in its own template:
- In Excel, save the sheet as CSV UTF-8 (File → Save As). Shopify's importer doesn't take .xlsx files.
- Make the columns match Shopify's product CSV template (download the sample from the import dialog). The URL handle identifies each product; variants are extra rows with the same handle.
- Go to Products → Import, add the file and decide whether to overwrite products with matching handles. Then start the import.
Two things to watch: when you overwrite existing products, the file's values replace what's in Shopify, so check what blank cells will do with Shopify's CSV help before importing a partial file. And there is no undo — keep a fresh export of your products before you import.
Step by step with ShopCSV
ShopCSV is a bulk product editor that opens inside your Shopify admin and shows products and variants in one editable grid. Every change is listed in Review Changes before it is saved, and a save can be undone later from History.
-
1Start from an export
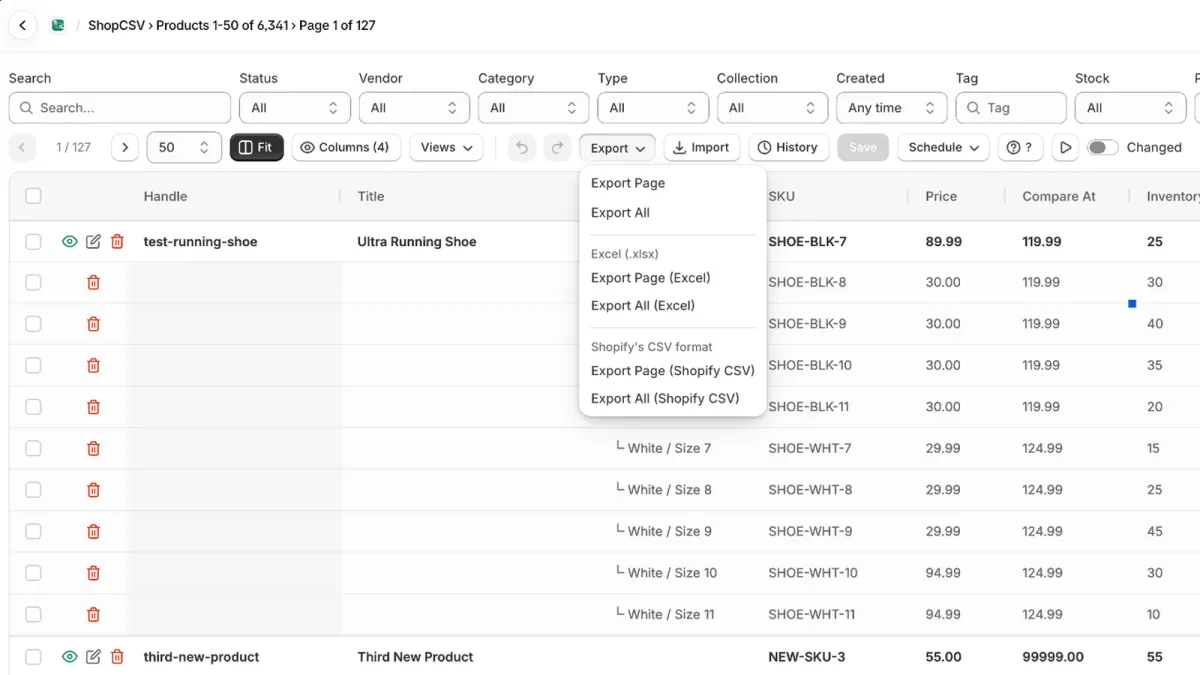
The easiest file to fill is one that already has the right columns. In ShopCSV open Export and choose Export Page or Export All — as CSV, as Excel (Export All (Excel)), or in Shopify's own format (Export All (Shopify CSV)). Starting a new catalog? Export one product and use it as your template.
-
2Fill the spreadsheet
Edit the file in Excel, Google Sheets or Numbers. Use one row per variant. The Handle column tells ShopCSV which product a row belongs to: an existing handle updates that product, a new handle creates a product. Leave a cell empty to keep the current value — an empty cell never clears a field. Save as .xlsx or .csv.
-
3Import the file
Click Import → Import CSV / Excel… and choose your .xlsx or .csv file. ShopCSV reads ShopCSV files, Shopify's current and legacy product CSV templates and Matrixify Products sheets. The file is read in your browser.
-
4Match columns ShopCSV doesn't recognize
If your file has columns with other names (for example from a supplier), the preview lists them under Columns: choose the field each one should be imported as, or Don't import, then Check again with these columns. ShopCSV remembers your choices for this store (column names only).
-
5Check the Import Preview
Nothing has changed yet. The Import Preview sorts every row into To Update, To Create, Skipped, Errors and Warnings. Each error names its line, column and value with a hint how to fix it; Download errors as CSV gives you the list to work through.
-
6Import and keep the undo
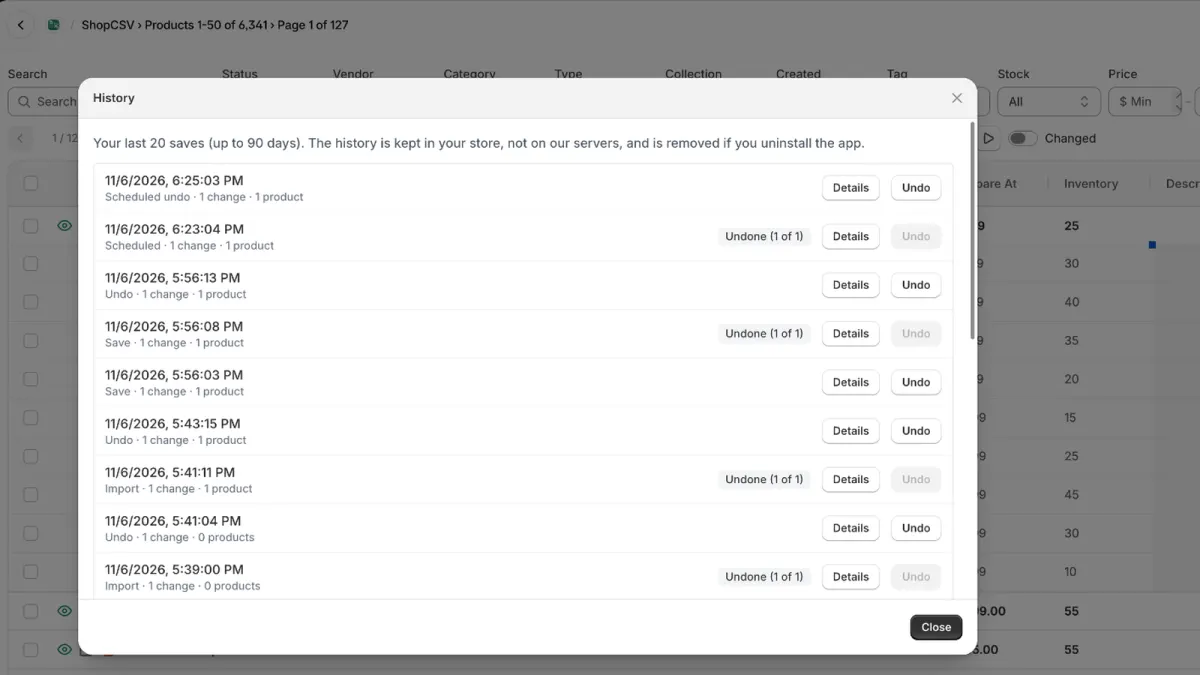
Click Import N Products. The import is recorded in History: Undo puts back the values it changed on existing products (products it created are not deleted — remove those in Shopify if needed).
Good to know
- Which columns work? Title, handle, vendor, status, category, product type, tags, SKU, price, compare-at price, inventory, variant fields such as barcode, cost and weight, description and SEO, collections, sales channels, metafields (
Metafield: namespace.key [type]), Markets and B2B price lists (Price list: name [CUR]), stock per location and translations. The easiest way to see the exact names is an export. - Images aren't part of the files. Add them with Import → Upload images (ZIP)…: files named by SKU or handle are matched to products, with a preview before anything is uploaded.
- Rows are matched by Handle. Within a product, variants are matched by SKU, then by variant title.
- Large files: the file is checked in your browser; for the smoothest run, import up to about 5,000 rows at a time.
- Plan limits: the free plan covers up to 100 products, Starter up to 1,000 and Pro is unlimited.
- Prices only? Often quicker in the grid — see how to bulk edit prices. Stock from a supplier every day? See how to update inventory from a supplier feed.
See it in two minutes
The ShopCSV overview video shows editing in the grid, bulk actions with a preview, scheduled sales, History and undo, and CSV and Excel files.