The built-in Shopify way
Shopify's bulk editor can show metafields that have a definition:
- Go to Products, tick the products and click Bulk edit.
- Add the metafield as a column from the columns menu of the editor.
- Type each value, then Save.
This is fine for a few products at a time. For a large catalog, the work is in getting values in quickly — from a supplier sheet or another column — and in being able to check and undo the result.
Step by step with ShopCSV
ShopCSV is a bulk product editor that opens inside your Shopify admin and shows products and variants in one editable grid. Every change is listed in Review Changes before it is saved, and a save can be undone later from History.
-
1Make sure the metafield has a definition
ShopCSV lists the product and variant metafields that have a definition in Settings → Custom data. The definition's type (number, true/false, date, colour, JSON…) is what ShopCSV checks values against.
-
2Show it as a column
Click Columns in the toolbar and scroll to Metafields. Tick the metafields you need — each shows its
namespace.keyand type — and click Done. Your choice is remembered; save it with filters and sorting under Views → Save current view… if you use it often.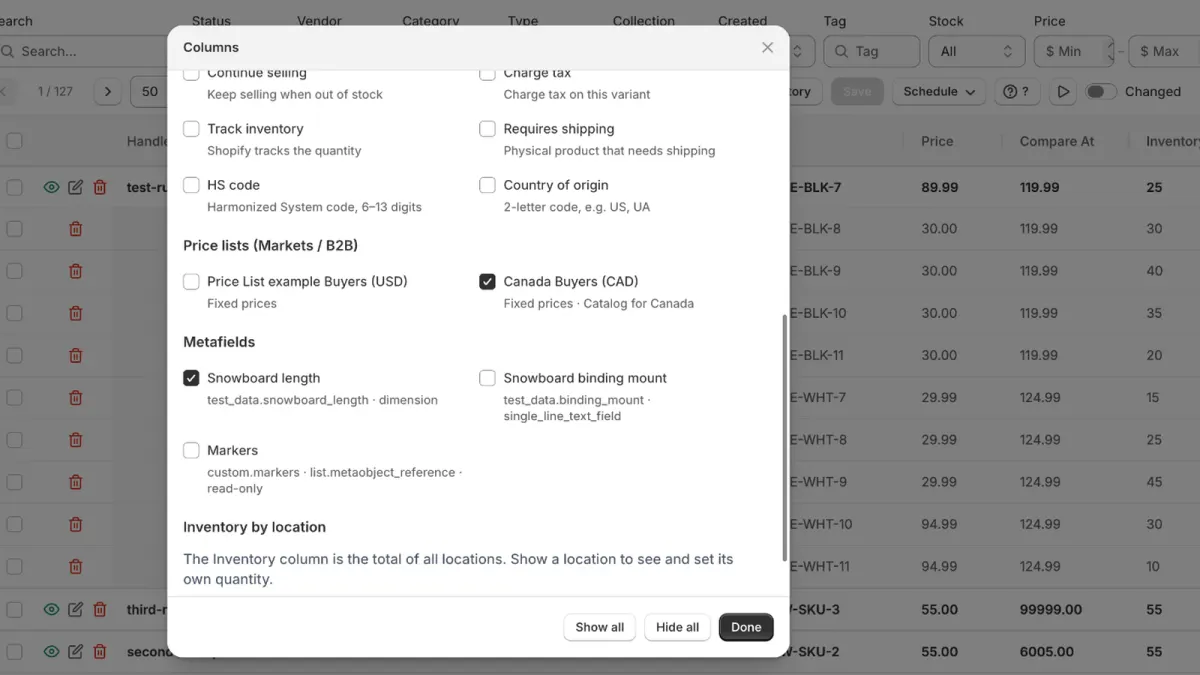
-
3Edit like a spreadsheet
Click a cell to type a value. To fill many rows at once, copy a range in Excel or Google Sheets and paste it with ⌘V / Ctrl+V, or check rows, click the cell to copy and press ⌘D / Ctrl+D to fill down. You can also drag the fill handle at the corner of a cell. Values that don't fit the type are marked red; an empty cell removes the value.
-
4Review and save
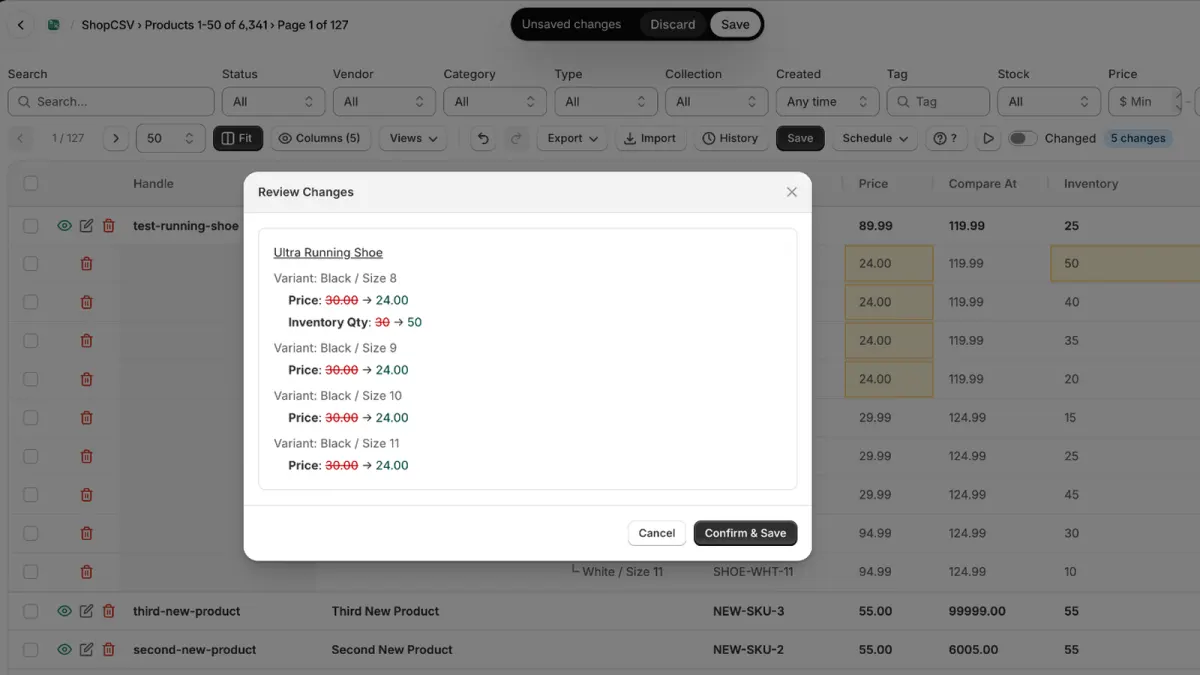
Click Save: Review Changes lists every product and variant with the old and new value, then Confirm & Save. A metafield that changed in Shopify after you loaded the page is not overwritten, and the save can be undone from History.
-
5Or round-trip them through CSV
Export All includes metafield columns named
Metafield: namespace.key [type]; variant metafields end in(variant). Fill them in Excel and import the file with Import → Import CSV / Excel…. In a file, an empty cell leaves the value unchanged.
Good to know
- Filter by a metafield: the Metafield filter shows products whose metafield has a value, is empty or is exactly a value — handy to find the products still missing one. Only product metafields with Filter in Shopify admin turned on in their definition are listed.
- Reference metafields (lists, products, files, metaobjects) are shown read-only; edit them in Shopify.
- The Bulk menu doesn't set metafields; use paste, fill down, the fill handle or a CSV file.
- Metafields change only when you edit those columns — showing a column changes nothing.
- Prefer a file for everything? See how to import products from Excel.
See it in two minutes
The ShopCSV overview video shows editing in the grid, bulk actions with a preview, scheduled sales, History and undo, and CSV and Excel files.